
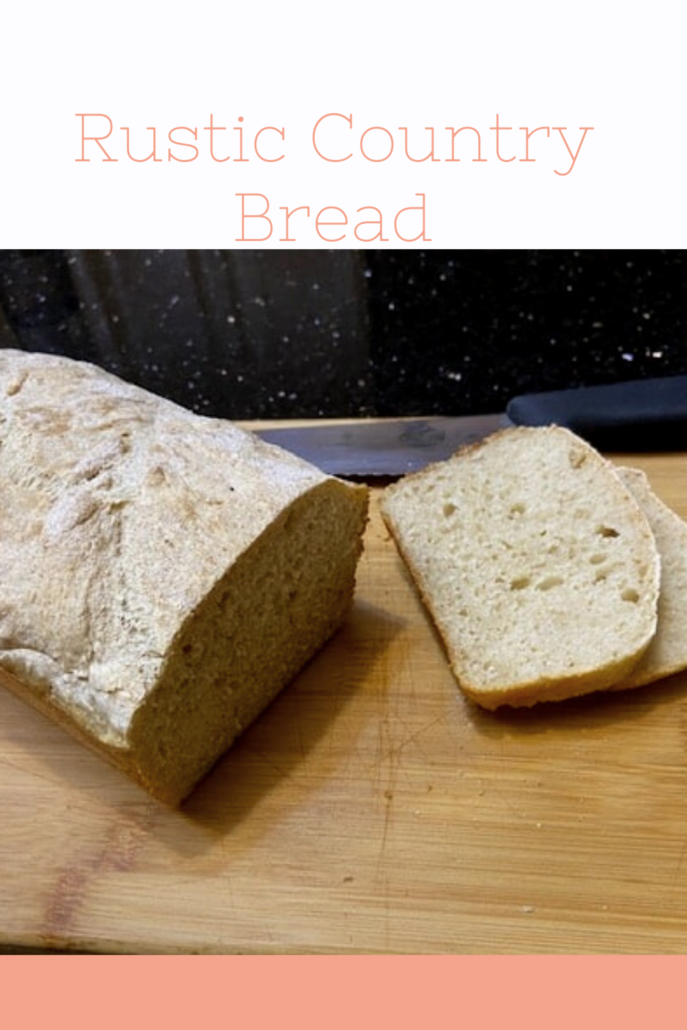
Rustic Country Bread or Don’t be Foolish Make a Poolish (Easy Starter)!
Like so many other people, during this never ending time of Corona/COVID, we had lots of time on our hands when in lockdown and we all tried to find things of import to do. For myself, I found baking and cooking helped to calm the savage breast and in general kept me from going a little nuts. So it was during this time period that I played with sourdough starter cuz I had the time to do so. Now I was pretty lucky in my endeavors and even if occasionally sluggish (solved by keeping it in the closed lit with the oven light but turned off oven) my starter worked and I produced amazingly delish bread.
BUT!! It takes for freaking ever till it is ready to use and if you don’t bake bread all that often I’d remember it lurking miserably at the back of the fridge turning all kindsa shades of mold. In fact, it looked like a science experiment gone bad. This happened to me like 3 times, count ’em, and I actually did the whole process again and again only once breaking down and begging some starter from a friend’s daughter. But I hate to be dependent on someone else’s starter to bake and worse, you again need to feed the darn thing, akin to feed me Seymour (said by the murderous alien) in Little Shop of Horrors. So I took a stand and decided to find something similar to sourdough starter without the endless hassle.
And, I discovered a number of possibles but present to you something so easy to do and which produces a very similar texture and mouthfeel that I dunno if I will even make a starter again. Mea culpa. It’s called a poolish (originated apparently in Poland, hence the name) which is basically a fermented sponge of water, flour and a bit of regular yeast (yup yup, we are cheating here) and you let it sit. You can let it rise anywhere from 2 hours (my most recent endeavor, very successful) to 16 hours. I’ve done overnight and really? not a huge difference in flavor. So people, I was really happy with the various and sundry results and wound up using yet another King Arthur Flour recipe and yes, of course, I fiddled with it, and presented the two hour version to Netanel and Ayelet for their (constructive, hopefully) criticism and yay, they loved it. In fact, the loaf sorta disappeared. We all agreed it was sourdough like in taste and texture and delish. So let’s shake off the shackles of starter and make a fake happily.
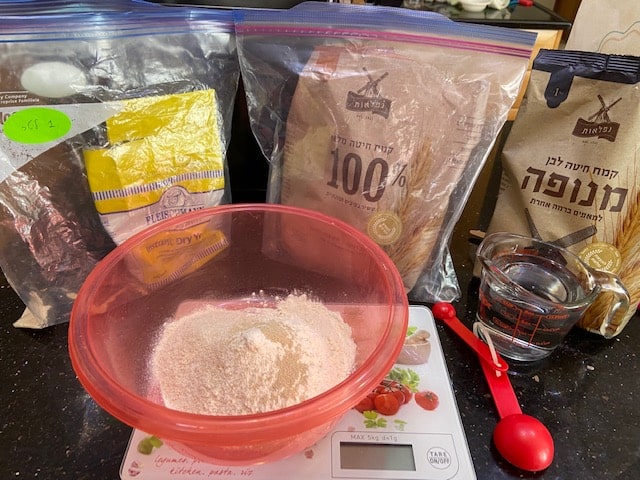
Start by gathering your ingredients.
What’s really neat is if you make it in a bread maker, just plunk the poolish ingredients right in there and mix and let rise. But I get ahead of myself.
K, so you see all it is is luke water, instant or active dry yeast and a mixture of regular white all purpose flour and a bit of whole wheat flour for that rustic touch. If you have bread flour to hand even better, but I often don’t so just know this works beautifully with regular flour as well. Good. Mix the flours (you can do it in the bread maker or mixer bowl, I just weigh them first. You can measure by cup, of course), add the dry yeast and mix and add the water and mix it up just till incorporated.
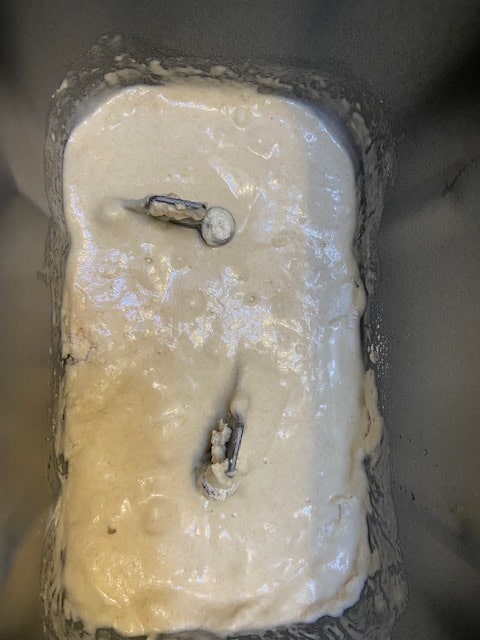
Good. It’s a bit thickish, that’s correct. That’s all for now. Let it nap quietly with the lid down. If making in a mixer, mix all the ingredients together and cover top of mixer with a towel and let it rest. Now this is totally up to you (dontcha love that?) how long you let the poolish/starter do its thing but at least 2 hours. After which time it should look like this:
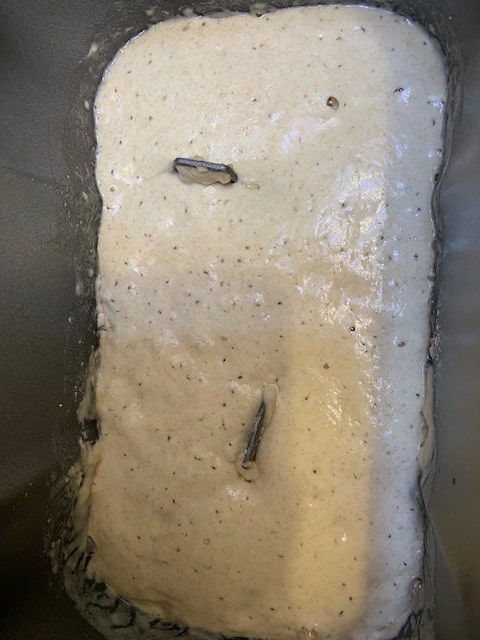
Note all those little holes or bubbles – this is excellent and what you want to have happen. Also note the contrast between the pic just above it when just mixed and how it’s risen in the container of the bread maker. K. Onward. Right smack dab into the same mixer bowl or bread maker container, you will add all the rest of the ingredients.

No worries, there ain’t much in the way of other ingredients. Add the additional water, flour, yeast, sugar and salt and mix it in to the poolish/starter and beat together either in a mixer or a bread maker till combined. Let rest about 10 minutes but you can cheat and skip the resting if you insist. (I did it but it’s not crucial).
Then mix the dough till it gets nice and smooth approximately 10-12 minutes. If using a bread maker, use the dough feature but pull out the plug and don’t let it continue to mix. You CAN overmix this.

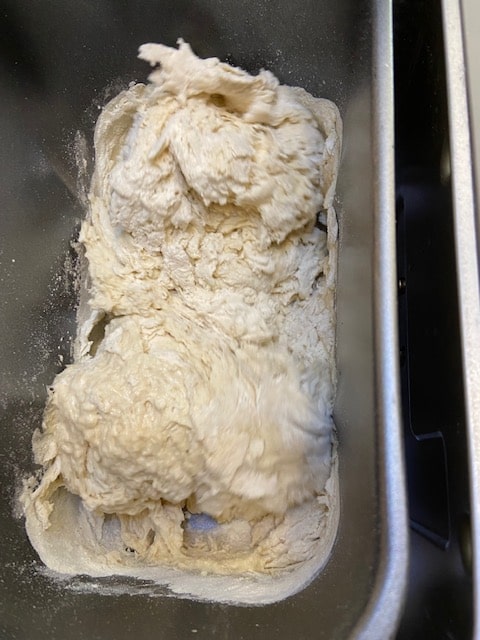
Now let the dough rest and rise covered in it’s container, either mixer or bread maker for approximately an hour or so or till dough has doubled in bulk. This does depend on the warmth of your kitchen. If your kitchen is very chilly (either a/c or wintery) try to put the container with the dough in a warm environment to hasten the rising.

Okey dokey. It’s risen. Now this little hack I impart free of charge. Don’t deflate the dough at all. Prepare one or two loaf pans depending on the size loaf you choose and grease properly or use parchment paper to line it and pour out the dough as evenly as you can into each loaf tin. Yup yup, you heard right. No punching it down, no shaping it. The nice holes that we want stay in better with no deflating of the dough and it’s so darn easy this way. Yes I have to gather the leftover bits with my fingers but most of the dough will satisfactorily plunk itself into your pans. K. Now they want you to let the dough rise again but if you do it my way, about 25 minutes should do it since you haven’t deflated it much. If you have a water mister fine, if not, just take a brush and lightly brush the tops with water. Then lightly sprinkle the tops with some whole wheat or white flour for a more rustic look.
In order to get a humid environment in the oven, we will again cheat and use a pan full of ice or if you don’t have that, full of cold water.
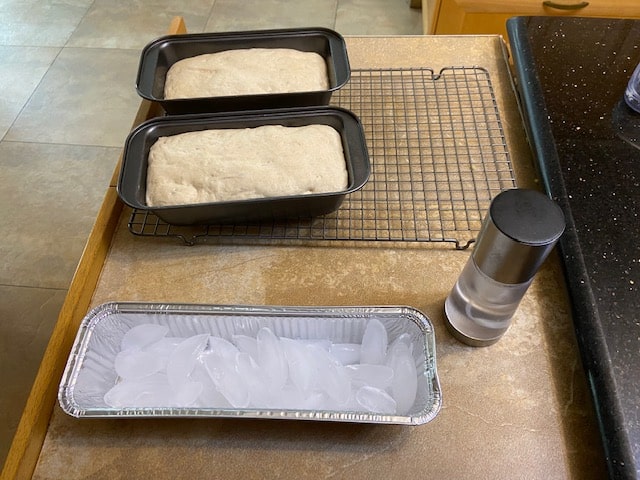
So, while your dough rises for the last time, preheat the oven to 425 F/ 220 C. The rising and temp should be ready more or less together. So pop the loaves in together with the ice/cold water.
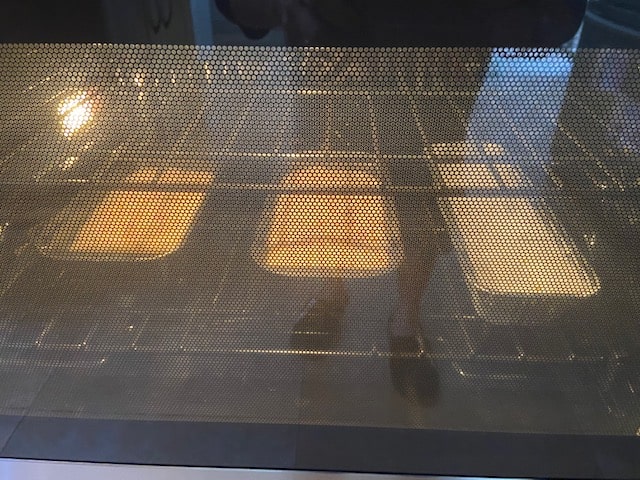
Bake approximately 25 minutes or till lovely golden brown. Remove from oven (ice will be water and cooked down somewhat, just discard liquid) and let loaves cool on racks. Critical!! Do NOT cut the loaves till cooled or texture can get gummy. Yes, I did it once cuz the scent of the bread drove me mad and I was sorry, gummola. Don’t do it people, trust me. Slice merrily when cooled and we slathered it with softened butter and collapsed with joy in our chairs.
Rustic Country Bread or Don’t be Foolish Make a Poolish (Easy Starter)!
The Poolish/Starter
1/4 cup (28 grams) whole wheat flour
1 1/4 cups (150 grams) all purpose white flour or bread flour
1/2 teaspoon active dry or instant yeast
1 cup (227 grams) lukewarm water
The Dough
All of the risen poolish starter
1/2-3/4 teaspoon active dry or instant yeast
1 tablespoon sugar
3 3/4-4 cups (450-480 grams) all purpose white flour or bread flour, a bit more to sprinkle tops of loaves
2 1/4 teaspoons salt
1 cup (227 grams) lukewarm water
Directions:
Start with your poolish/starter mixing the flours and yeast right in the mixer or bread maker and adding water till a thickish mixture forms. Now let this rest, covered in the mixing bowl or bread maker container for between 2 hours to overnight but not more than 16 hours. I have done both 2 hours and overnight and there is not a huge difference in flavor, it’s more subtle so up to you. The poolish should rise nicely and have little bubbles/holes in the dough (it does not rise as high as the finished dough).
Next right in the same bowl, add the dough mixture, the yeast, sugar, flour and salt and the water. Mix all together and if you have time, let sit a bit to incorporate the liquid but if not, I’ve carried on without. Mix till the dough is smooth, only adding the extra flour if necessary, about 10-12 minutes. Now if in bread maker, unplug. Don’t let it go through a whole dough cycle it will overmix it. Now cover with lid or mixing bowl with a towel and let rise till doubled in bulk. DO NOT PUNCH DOWN DOUGH. This is important both because it won’t get those cool holes in the finished bread product and also will take a lot longer to rise again.
Prepare one or two loaf pans depending on the size you want by greasing well or lining with parchment paper and POUR the dough evenly into the two pans. Yes it’s a bit thick but it works. The leftover bits you can scrape out with your hands. Lightly brush or spritz tops of loaves with water. Sprinkle with white or whole wheat flour for that rustic look and place in warm spot to rise for about 25 minutes and while it’s rising for the last time, preheat your oven to 425 F/220 C. Take a pan and fill with ice or cold water and put the loaves into the oven with the ice/water (this keeps the oven humid). Bake about 25-30 minutes or till golden brown and beautifully crusty. Let cool on wire racks and DO NOT cut till the bread cools or it will get gummy and what a shame. When cooled slice and enjoy.
the original King Arthur version:
https://www.kingarthurbaking.com/recipes/french-style-country-bread-recipe


Leave a Reply
Want to join the discussion?Feel free to contribute!