
Naan, a Yummy Indian skillet bread
I’m wracking my brains in order to remember the last time I ate in an Indian restaurant. In Israel it was well over 20 years ago but I ate out with my friends in London a few years ago at a wonderful restaurant and DH and I happily snorfed down large quantities of every kind of dish placed on the table.
The food was spiced but not too spicy if you get me. I recall enjoying the bread put on the table which looked to me more like a lafah – flat pita type bread than anything else. These are apparently Roti and are unleavened, therefore flat. But I remembered the meals fondly and they are tucked in the back of my brain. Hence, when the other day, I came across a recipe on the internet from Chef Steps for Naan, also an Indian bread, that looked quite tasty, I decided to try it. Of course, I fiddled about with it.
They looked sort of like fat pitas but are made with yogurt mixed with water and are a yeast bread. Since I wanted it to be close to the original recipe, this was to be a go with for a dairy meal. This is normally made with white flour but I cheated and used whole wheat pastry flour. I know, I know, less authentic, but…
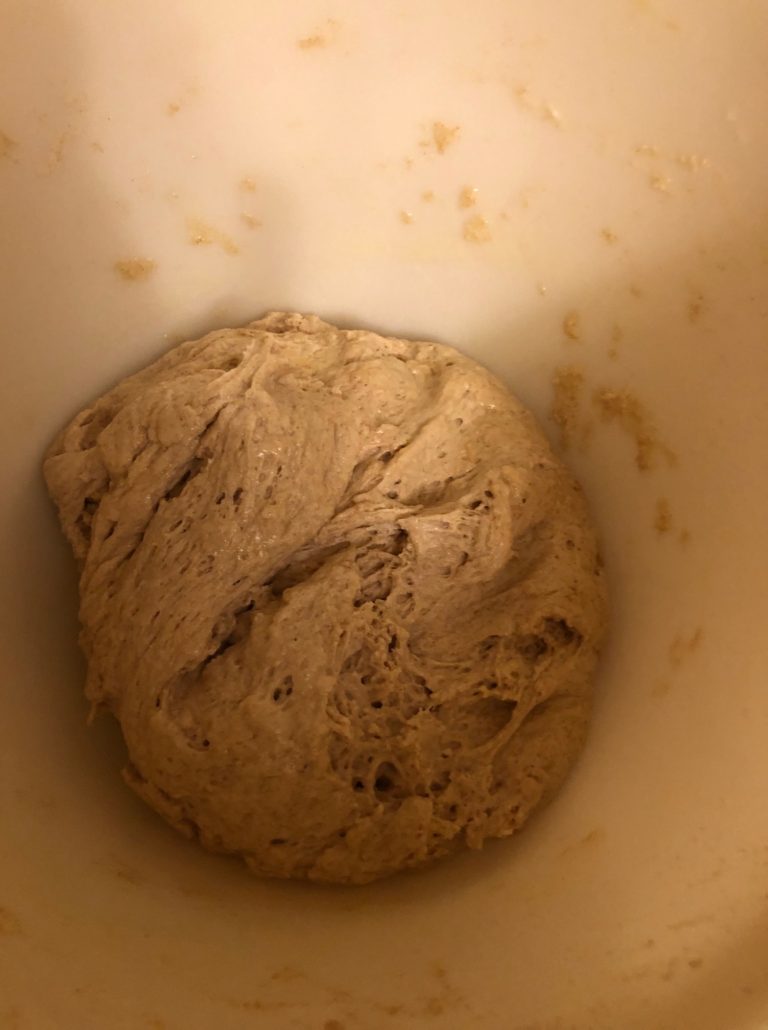
I was good and measured the ingredients precisely by weight but since I use instant yeast and not active dry, I mixed the dry yeast right into the flour, no need to proof or activate it (one less step, yay). I whisked very very warm water with the yogurt and whisked the whole lot into the flour, sugar, salt and yeast mixture and it mixed so beautifully that I didn’t need to pull out my mixer. I kneaded the dough briefly by hand and it was like play doh for adults. Squishy and fun and since it formed up so quickly and beautifully, it took but a few minutes.
You then oil the bowl and turn the dough to coat with the oil (I use oil spray, fast and easy) and let rise for 30 minutes.
Amongst other changes I made, I found it unnecessary to punch down the dough and let it rise again since it was such a lively dough that after pinching off balls and pressing out the round pita-like shapes, it was rising away and didn’t need that extra time.
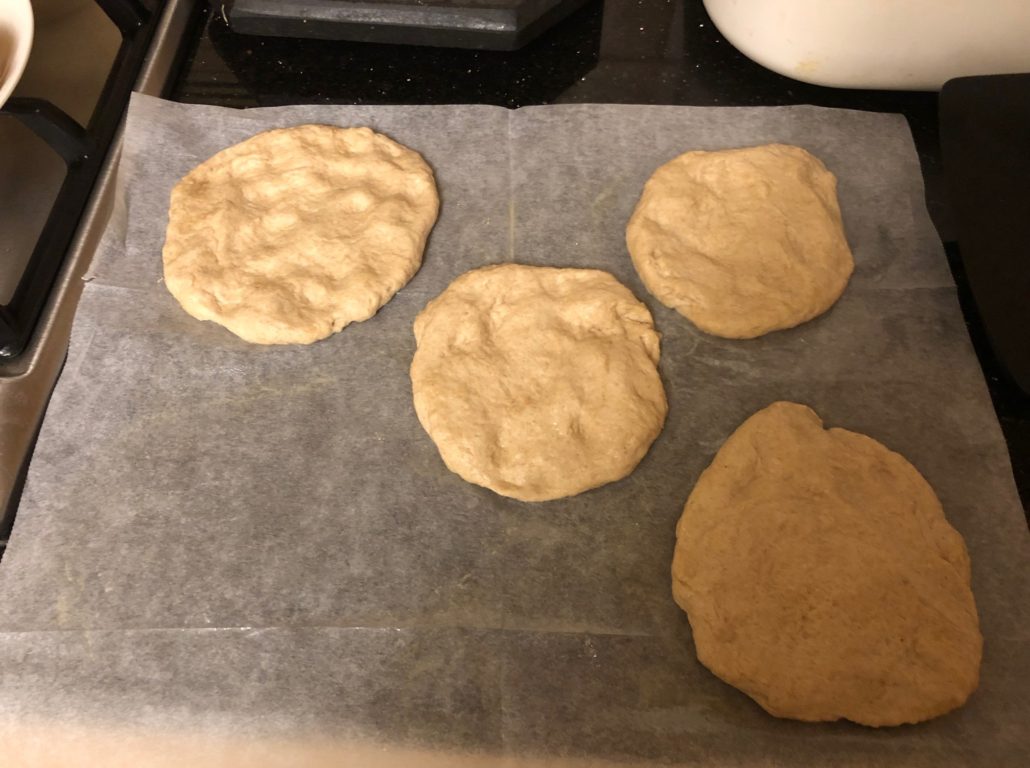
I laid them out on parchment paper and this made peeling them off and popping into the skillet a snap, since they don’t stick.
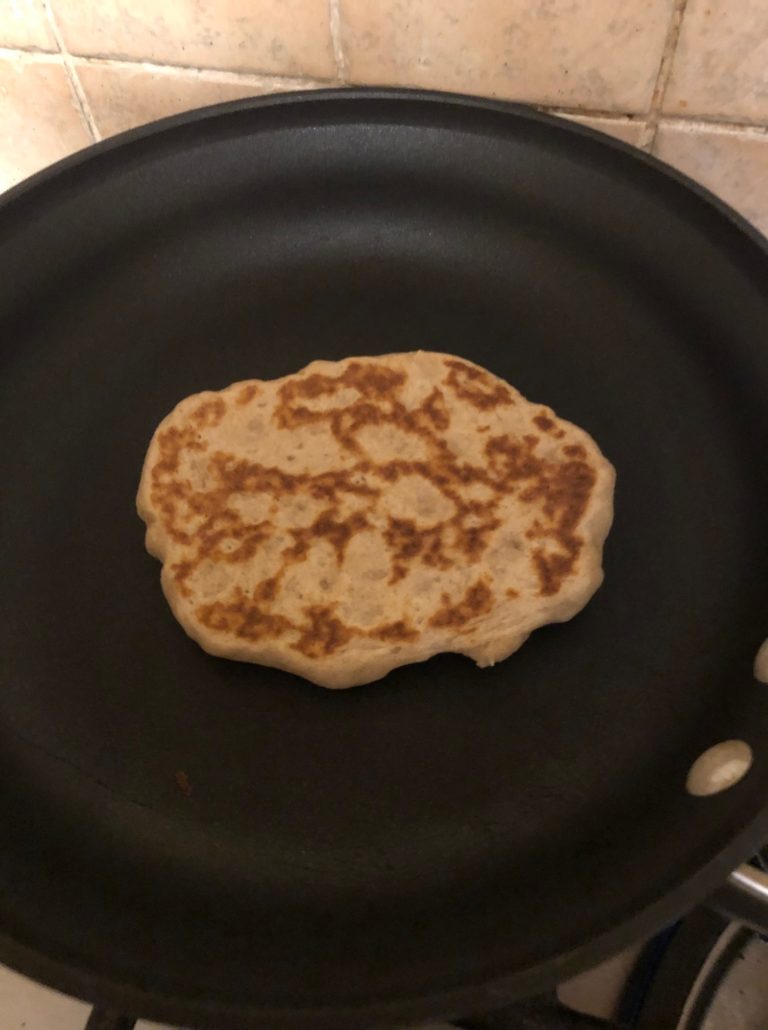
Note how it puffs up in the pan. Unlike pancakes, it’s bumpy, that’s as it should be. I found it needed 2-3 minutes of cooking on each side to be thoroughly cooked. I used no oil in the pan, neither plain oil or spray oil. You don’t need it. The dough hisses as it hits the hot pan, and again when you flip it over to the other side. You are not frying it, you are pan cooking it. In fact, the only oil in this recipe is when you coat the dough before leaving it to rise. I also sprayed my hands with oil spray to form the balls more easily without sticking to me.
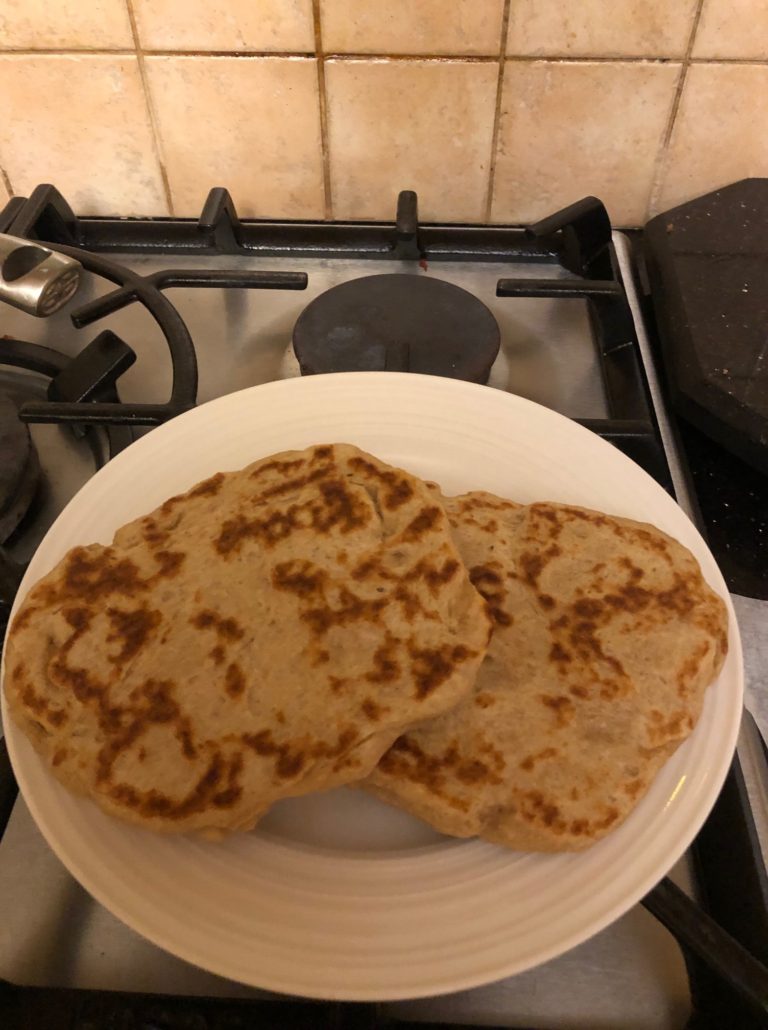
And when they landed on a plate, I had to grab one and bite in. It is soft and lush on the inside with a touch of crispy on the outside and you taste a hint of tang from the yogurt. OMG, happiness was a bite of Naan. DH who wasn’t in the mood for a bread product almost snooted it but then smelled the smell and saw how they looked and said, “Well maybe I’ll try one.” Three Naans later… 🙂 .
Skillet Cooked Naan
Just a quick note, I often work in gram measurements since I weigh much of my ingredients to be more precise in baking. Hence, you will find these seemingly odd measurements below. If you don’t want to weigh it, just with cup/spoon measures, approximate as closely as you can.
1 cup (225 grams) plain yogurt
1 cup (225 grams) very very warm (but not hot) water
4 3/8 cups (550 grams flour) bread flour or I used white whole wheat flour
5.2 teaspoons (14 grams) yeast (I use instant dry)
5.2 teaspoons (14 grams) sugar
1.41 teaspoons (8 grams) salt
Directions:
Whisk together the yogurt and the very warm water. Set aside. Whisk together, either by hand or in the mixer, the flour, yeast, sugar and salt. All at once, add the yogurt-water mix to the flour mix and whisk till you need to use your hands or are using your mixer. Squish merrily (truly, not a long process, I promise) till you form a nice soft dough that has a lovely texture. Oil the bowl and turn the dough to coat on all sides. I used to cover with a towel but have switched to plastic wrap which I feel aids the dough in the rising.
Go read a book, make a cup of tea or coffee or take a little nap for 1/2 an hour. Mosey back into the kitchen and the dough should’ve risen to twice its size. Lay down a piece of parchment paper, oil (or spray oil) your hands, pinch off balls according to the size you want to eat (see photo above for an approximate idea) and put the dough balls on it and with your fingers, push down into the dough and pat out till it becomes a circle.
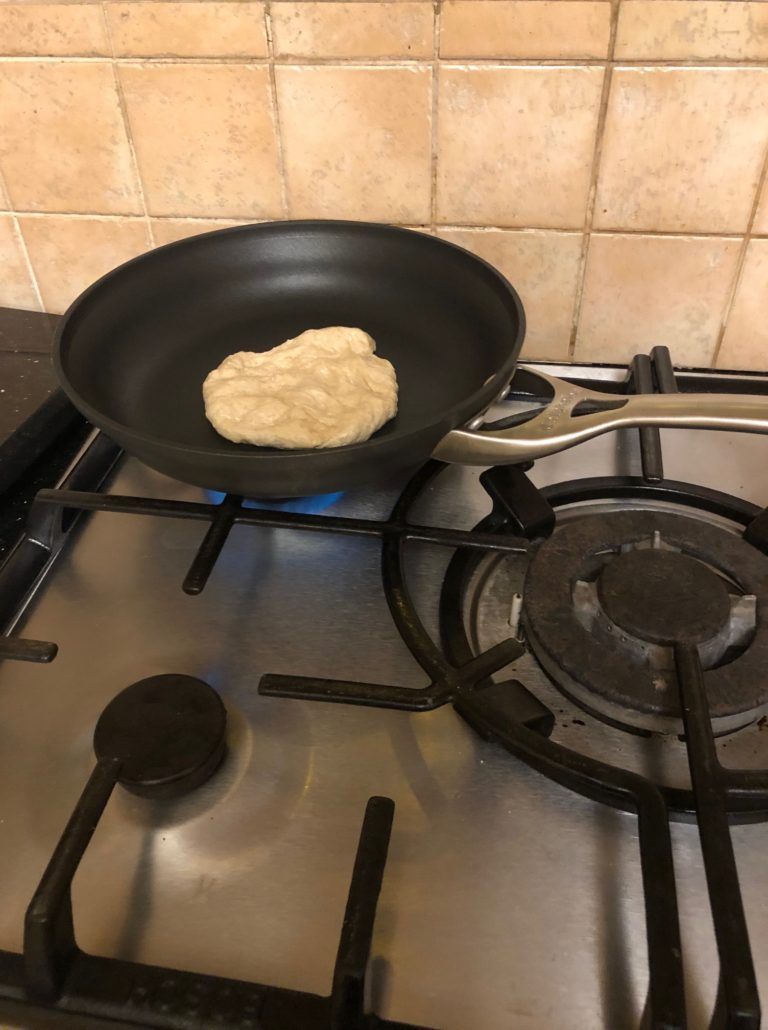
Get your pan ready (non stick) and heat it till hot, not medium. By the time the pan is hot, the dough will have risen a bit. Gently lift a circle of dough and place on hot pan and hear the sizzle. Let cook for about 2-3 minutes on one side using a spatula to lift and peek under the Naan to see if it’s properly browned and flip and repeat for another 2-3 minutes. Stack on a plate and gobble them up. If you don’t finish them off in one sitting, although they are best eaten shortly after cooking, you can store for the next day in the fridge. I found they are excellent split and used for grilled cheese or toasted and buttered and/or jammed the next day. Yummmmmm.
The original version: https://www.chefsteps.com/activities/no-nonsense-naan.


Leave a Reply
Want to join the discussion?Feel free to contribute!