
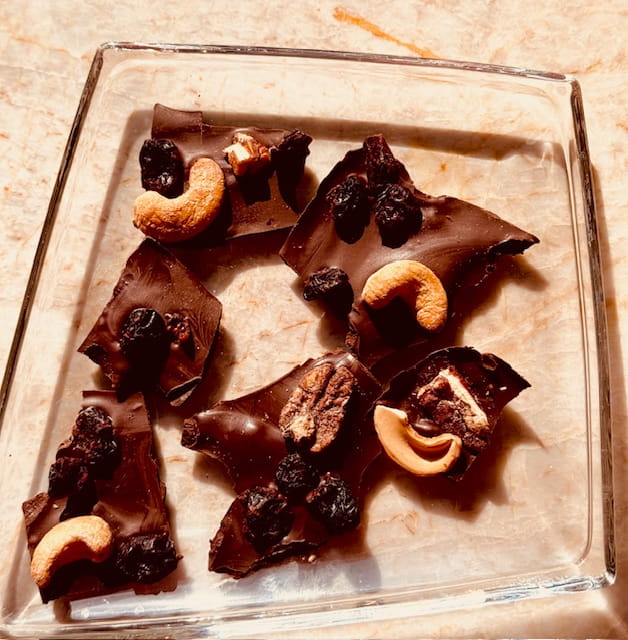
Chocolate Bark with Cashews, Pecans and Dried Cranberries
We were at my SIL and BIL’s house, Yo & Len for a Shabbat recently and were relaxing and enjoying each other’s company (missed having Stu & Suzy with us but next time) and I always wait to see what new ideas Yo comes up with. She had a few things I particularly enjoyed but this was so good and so easy to make that I decided to share it with you. She used a slightly different combo but that’s the beauty of it, you can add whichever nuts you prefer – almonds, walnuts, hazelnuts (I used pecans and cashews) and with or without dried fruit as you like. The trick is to temper the chocolate – do NOT freak out, I promise it’s easier than easy to do, no thermometers needed, so that the end result is chocolate bark that snaps when you break it, not scorched or lumpy.
Don’t worry, I have pictures for all the steps (to the point you may wish to skip some but I wanted you to see how it looks) and personally, I find it great fun to make besides the deliciousness of it all. I tried this out on adults (loved it) but also on my five granddaughters who were with us for Shabbat, ages 8.5-13.5 and surprisingly, not a scrap was left. This is impressive since I not only had other desserts but used the good quality dark, not semi sweet chocolate. It really only pays to make it with the good stuff since it’s primarily the star of this show. Update since I typed this, I had another chocolate craving (those who get it, got it) and made this with little clusters of granola just to see how it came out and it was awesome, just sayin’.
A note, when in my baking/chocolate course with Galia Agayev, she did teach us how to temper chocolate properly with equipment and rechecking etc. Forgive me Galia, this is the unprofessional version which absolutely works. Onward, I say!
Gather your ingredients
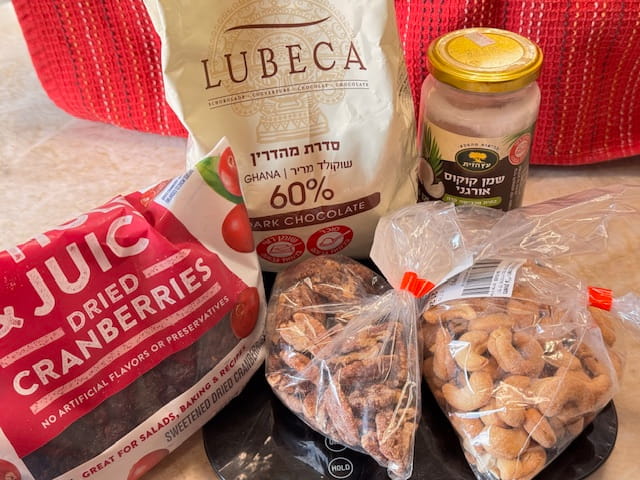
As you see, not too many ingredients. Another note. I used salted, roasted nuts, quite on purpose. There’s no need then to toast or roast anything nor to add salt to the recipe since it’s already in it. So as you see, it’s all about the chocolate. K.
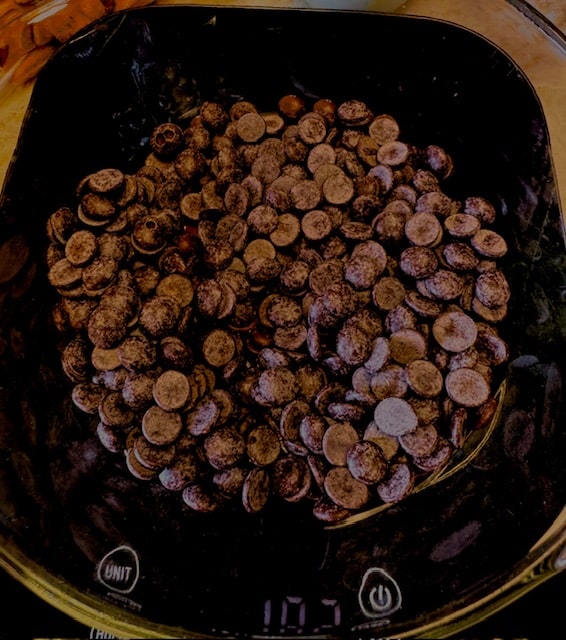
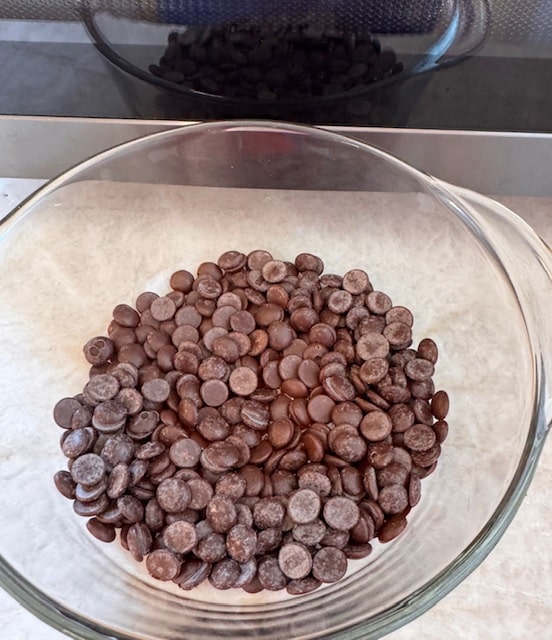
Take a microwaveable bowl, I used glass, and measure or weigh your chocolate. It will be enough to fairly thinly coat the bottom properly of a 9 x 13 (23 x 33 cm) pan in which you will place a piece of parchment paper for ease of removal.
I give you the amounts by ounce, cup and grams but I find weighing it oh so much more accurate. The chocolate I used were small disks which melt easily. Really avoid using chocolate chips since they are made to not melt easily so as to retain their shape in cookies but if you have no choice, so be it. Best if you’re not using good disks is to buy some nice chocolate bars and chop ’em up. They too melt well.
Now mind you, I didn’t specifically use chocolate with the white bloom above, but it’s the opportunity to explain that this is not mold but rather, can frequently happen to chocolate by the sugar or fat coming to the top, usually because of changes in temp (in your house, in the transport, what-have-you). No worries, you can absolutely use it, it’s fine. Not only that, tempering the chocolate (what you’re about to do) removes the bloom and restores the chocolate to its proper color.
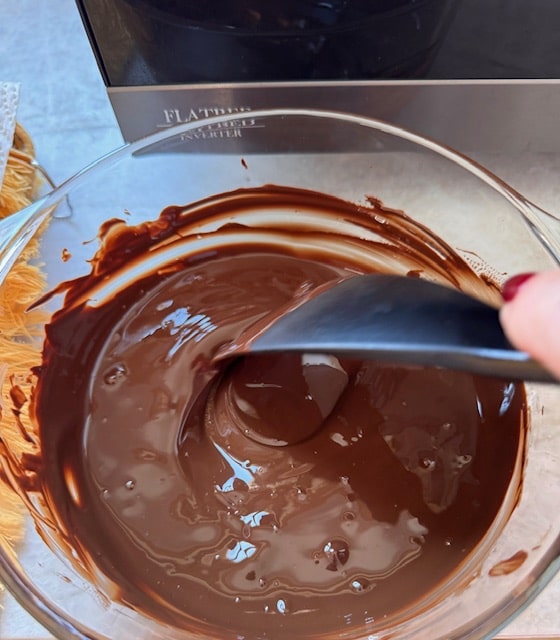
The trick to the melting of the chocolate is you zap it in the microwave for an initial 30 seconds. Stir it even if it looks the same as when you put it in.
Stir it, Really. K. Back in it goes. Now 15 second intervals. Press time for 15 seconds, remove and stir, stir, stir. Never mind if it’s still mostly whole disks. Okey dokey, another 15 seconds and it might start to look like this. Give or take 15 seconds.

Now stir like a fiend. It will get a bit meltier. Another 15 and it should look like this:
You see the lonely one or two melting disks in there and stir it up and you might say, EUREKA! I’ve done it! Not to ruin your fun buuuuuut, nope, uh uh. Now you add the 1/3 cup of disks or chopped chocolate that you’ve set aside from the total chocolate amount and add in. This is how you will temper the chocolate. But I have been known to cheat, hmm.
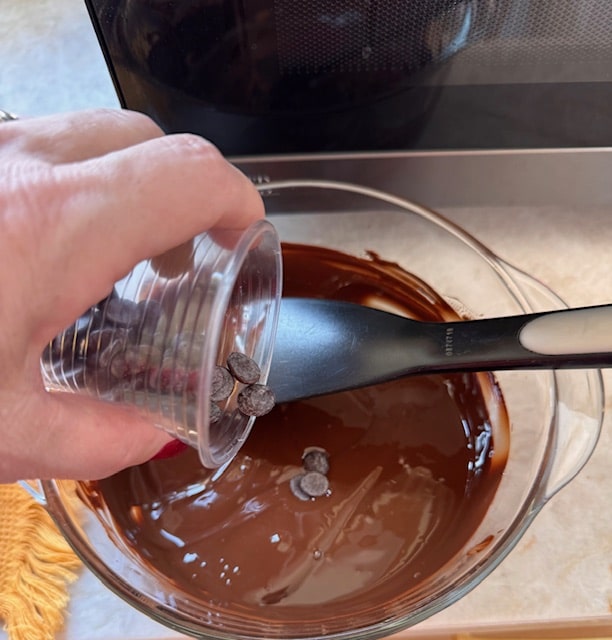
and stir again like a whirling dervish till smooth.
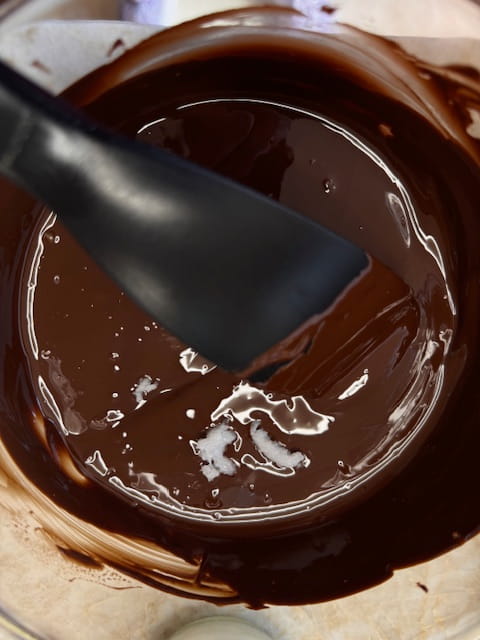
Here’s the cheat. I’ve found time and again that the last bit needs a coupla seconds of help. Zap for about 8 seconds more (don’t do more!!!!) and it’ll melt smooth. If yours melts without that help, great, if not, 8 secs. Add the 1/4 teaspoon of coconut oil and stir. (This also helps it harden properly). Now pour it into the prepared (parchmented) pan.
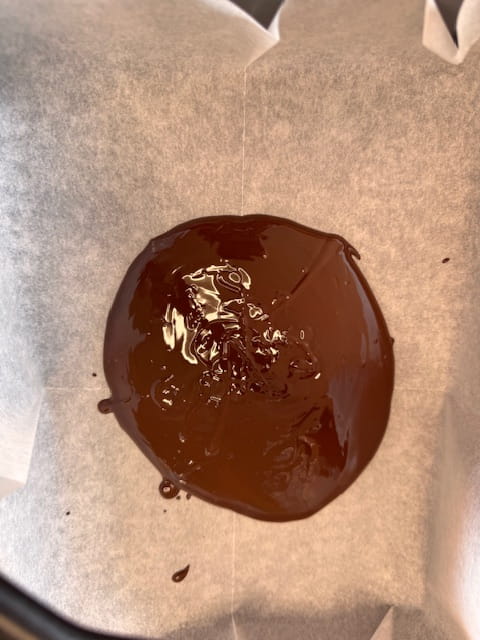
Tilt the pan and help it along with your stirring spatula or spoon and tuck the chocolate, so to speak to the edges as evenly as possible. This is not a thick coating and that’s correct.
Now’s your chance to decorate with your nuts and/or dried fruit and to make it look pretty as well as tasty.
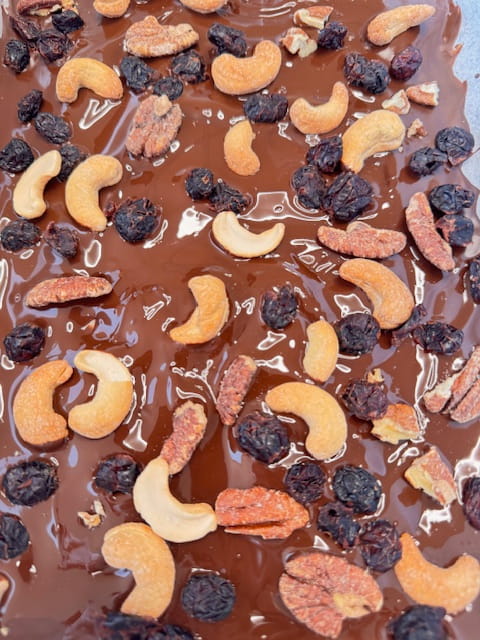
You can sprinkle with abandon just remember the fruit and/or nuts must touch the melted chocolate or it will not stick and become a whole. Now’s the hard part. You wait. I advise against popping into the fridge since this dulls the shine of the chocolate (less attractive) but if you’re desperate (guests on your doorstep, the scent of chocolate driving you mad) about 15 minutes in the fridge should do the trick. Otherwise wait for about 20-30 minutes of natural air drying for it to harden properly. Once it’s set up, you simply break into pieces with your hands. And if a few pieces disappear from the pan and you discover you’ve eaten them, well who could blame you?
Chocolate Bark with Cashews, Pecans and Dried Cranberries
7 ounces (approximately 1 1/4 cup) (200 grams) of dark good quality chocolate (60%)- of which you set aside 40 grams (1.5 ounces or about 1/3 cup)
1/4 teaspoon coconut oil
1/3 cup (40 grams ) cranberries or raisins
1/3 cup (40 grams) salted, roasted pecans
1/3 cup (40 grams) salted, roasted cashews
Directions:
Prepare a 9 x 13 (23 x 33 cm) pan by lining with parchment paper. Set aside.
Take 160 grams of the chocolate (1 cup minus a tablespoon or so) and place in a microwaveable bowl (I used glass). Zap in microwave at full power for 30 seconds. Remove from microwave and stir with a wooden spoon even if it doesn’t look melty. It will break down somewhat. Back it goes for 15 second intervals and remove and stir till you see it’s melty with a few bits in it. Stir and while still hot, add the remaining chocolate and stir like a fiend till smooth and melted, if the last bit doesn’t fully get smooth, zap for no more than another 8 seconds, add coconut oil and stir. Immediately pour and scrape all the chocolate into the prepared pan, smoothing out till a thinnish layer of chocolate coats the bottom of the pan. Take your cashews, pecans and dried cranberries and sprinkle with abandon over chocolate making sure the nuts and cranberries are touching the surface of the chocolate. Now wait patiently for about 20-30 minutes or so till the chocolate sets and hardens. Preferably don’t put in the fridge since it will dull the shine of the chocolate. If really desperate pop in fridge for 15 minutes. When cold and set, break into pieces as you like in size.


I loved your post!!
Your instructions were so easy.. I can’t wait to make these!!
Thanks, Mindy!! Hope you enjoy it!
Looks great for a Nash board. Thanks. Will definitely try
my pleasure, enjoy!